In this Below the Stone Guide, we'll help you get started with the game and teach you some tips & tricks to make your expeditions easier!
Below the Stone is a roguelike action RPG that challenges you to Mine valuable ores and battle enemies across the Map. It can be brutally unforgiving if you don't know what you're facing, though, so we're here to help you out -- keep reading to learn about the HUD and the basics of Below the Stone!
Below the Stone HUD Explanation

- Quests: This will show you your progress on the 1 to 3 Quests that you accepted before going underground.
- Escape Pod Button: Pressing this button will call the Escape Pod to a location near you. You cannot call the Escape Pod until you've completed at least 1 of your Quests. When the Escape Pod arrives, its location will be marked on the HUD with a green arrow.
- Journal: This shows you your current Quests and a Bestiary for all of the creatures you've encountered.
- Hotbar: This is where you have to place items if you want to use them.
- Health: The standard Health bar. If you take too much damage and this drops to 0, you die.
- Inventory: This is where you'll store all of your excess loot. You cannot use items directly from your Inventory; they have to be equipped on your Hotbar.
- Equipment: These slots are for your equipped Armor.
- Total Resistance: This number shows the total Resistance you have; higher Resistance means reduced damage from enemies.
- Gold: This shows how much Gold you currently have.
- Minimap: This is a 32x32 tile Minimap that shows you the immediate area. There is no larger Map in the game, unfortunately.

Below the Stone Guide | Starter Guide
With the HUD explanation out of the way, it's time to move on to the meat of this Below the Stone Guide. We'll kick off this Below the Stone Starter Guide from the very beginning and walk you through your first mission!
Creating Your Character
You'll start off Below the Stone by creating your character. You can pick a name, hairstyle, beard style, body color, and hair color. You can, if you wish, cycle through randomized characters by clicking on the die next to the name box.
The name and appearance of your character is purely cosmetic. Set things up to your tastes and dive in!
Clearing the Old Halls
Your very first mission will be in the Old Halls, an abandoned area in the Dwarven realm. It seems that the Blacksmith has gone and gotten himself kidnapped by Kobolds and you've been tasked with saving him.
Fortunately, the Head Explorer is there to guide you. He'll equip you with a Soup Ladle to defend yourself and... that's about it. Fortunately, this pitiful weapon will be more than enough to survive this area.

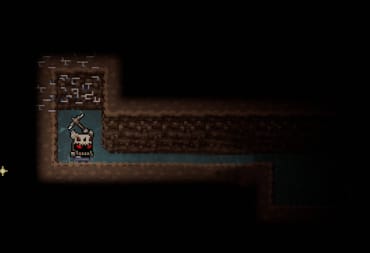
Move through the Old Halls and destroy every box in sight; this will give you Wood, a useful Resource that can be used to make Torches and other items. Follow the path through the Old Halls and you'll find a chest that gives you a Rusty Pickaxe.
Go back to the entrance and dig through the dirt using the Rusty Pickaxe. You'll see a few Kobolds on the other side of the wall. Break through and kill them with the Soup Ladle, then talk to the Blacksmith.
Thoroughly loot the area and then head back to the Head Explorer. You can now go through the gates at the bottom of this area and return home to The Kingdom.

Returning to The Kingdom
The Kingdom is your primary base of operations between expeditions. Head straight north and you'll meet the Banker; he lets you store any items that you don't want to take on an expedition.
Put away everything except your Soup Ladle, Rusty Pickaxe, and Torches. You'll be able to expand your Vault later by spending Gold if you need more space.
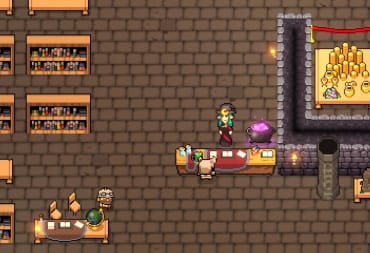
Next, go to the right and talk with the Blacksmith.

The Blacksmith is where you'll convert the spoils of your Mining into useful items. Ore can be made into Ingots, and Ingots can be made into useful equipment such as Swords, Armor, and more.
For now, the Blacksmith will give you some Coal and Wood to make Torches as a tutorial. Craft these items and put them on your Hotbar.
You can, if you wish, go to the western side of the Kingdom and talk with the Elf, the Goblin, and the Head Explorer again. The Goblin buys and sells items and the Elf makes Potions. Both of these services require Gold, though, and you don't have very much right now.
Choosing Your First Quests
When you're finished exploring The Kingdom, head back to the southern gates and speak with the Foreman. It's time to pick your first Quests!

You are given a random selection of 5 Quests. Quests are, generally speaking, separated into 3 types:
- Kill Enemies: Kill a specific number of enemies.
- Collect Items: Collect items such as plants or Ore. In some cases, you may have to collect special Resources such as Corbomyte Ore which are only used for Quests and nothing else.
You can choose up to 3 Quests. Completing a Quest will get you bonus treasure; you can get up to 3 pieces of bonus treasure depending on how many Quests you complete in an expedition.
The bonus treasure is:
- Sack of Gold: 200 Gold awarded in addition to the Quest reward.
- Small Chest: A small chest filled with random loot.
- Large Chest: A larger chest filled with random loot.
If you're feeling adventurous, you can select 3 Quests.
There are three important things to know about going on an expedition.
- You can't call the Escape Pod and return to The Kingdom until you've completed at least one of your 3 Quests.
- Exiting to the main menu will roll back your progress to before you left.
- Dying on an expedition will cause you to drop almost all of the loot you're carrying and most of your equipment.
Once you've picked your Quests, it's time to head south through the gates and go underground!

Surviving Below the Stone
You'll begin your expedition at the exact center of the Map. You're in Layer 1, the easiest area of the game. Still, it can be plenty tough -- don't underestimate the enemies in this area!
The very first thing you should do is to start collecting the red Mushrooms (Mushroom Caps) and green plants (Gloweed). Mushroom Caps can restore 5 HP when you eat them, and Gloweed can give you a 2-minute Buff that lights up the area around you. You can never have too many of these items, especially Mushroom Caps.
Naturally, you'll want to focus on completing your Quests. For your first expedition, you'll also want to try to Mine as much Coal and Tin Ore as possible. Tin can be used to make better equipment, and you'll need Coal to convert Tin Ore into Tin Ingots.
Calling the Escape Pod
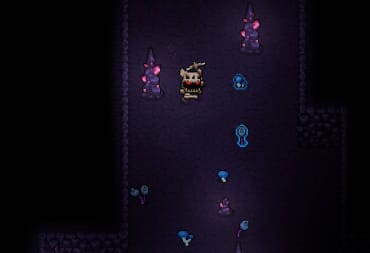
Once you've completed at least 1 Quest, you can call the Escape Pod. A circular area will spawn near you. Step inside and the Escape Pod will begin to come down, but you'll also have to fight off enemies.
Standing inside the Escape Pod zone will cause it to start coming down toward you. However, this will also spawn a constant stream of enemies. I recommend circle-strafing around the area and doing your best to avoid a straight-up fight since you probably don't have much Resistance yet.

If you step outside of the area, the progress percentage will stop counting up to 100% and begin declining. You can step out of the circle briefly if you need some room to move around, but you'll otherwise want to stay in the circle, generally speaking.
Once you summon the Escape Pod, the zone is locked for this expedition. Similarly, once the Escape Pod is called down, it will stay in that exact spot until you decide to leave. A green arrow will point toward the location of the Escape Pod.
I recommend calling down the Escape Pod as soon as you complete a Quest. Fighting all of these enemies can be tough -- if you're running low on supplies, a deployed Escape Pod is a nice safety net.
Speaking of Quests, Slimes will typically spawn when you call the Escape Pod. Calling the Escape Pod is a good opportunity for easily completing any Quests involving Small or Medium Slimes.
When the Escape Pod finally lands, it will deal 1,000 damage to all enemies around it; you won't take any damage. It's entirely a valid strategy to simply outrun all of the enemies chasing you and let the Escape Pod kill them.
You can exit the expedition by simply walking into the Escape Pod. If you don't want to leave just yet, make sure to stay away from the Escape Pod. When you do leave, you'll rocket back up to The Kingdom after a short countdown.
Return Home and Repeat
You'll find yourself back in The Kingdom after your short trip in the Escape Pod. You can now collect your Quest rewards, get new equipment from the Blacksmith, sell excess items to the Goblin, and stash away your extra loot in the Vault. (Don't forget to make some Potions with the Elf, too!)
If you managed to get enough Tin Ore and Coal, you'll probably be able to make a full set of Tin equipment. You can then use this to explore deeper in Layer 1 and get Copper items. Then, you can use these Copper items to move onto Iron.
You should now have a solid grasp of Below the Stone's basics, but there's still a lot more to learn about this game -- make sure to check out our other guides below!
Penalty for Dying
If you die in Below the Stone, you'll lose the vast majority of items you're carrying. You'll automatically get a Rusty Pick as a failsafe backup so you can recover from a huge loss.
Below the Stone Save FileeLocation
You can find the Below the Stone Save File in:
C:\Users\USERNAME\AppData\LocalLow\Strollart\Below The Stone\Profiles
Where "USERNAME" is your Windows username.
Thanks for reading this Below the Stone Guide -- make sure to check out our other guides below!
Have a tip, or want to point out something we missed? Leave a Comment or e-mail us at tips@techraptor.net
One of my earliest memories is playing Super Mario Bros. on the Nintendo Entertainment System. I've had a controller in my hand since I was 4 and I… More about Robert N